Contact Roles- PBIS Rewards
Learn how to manage contacts roles in order to effectively prioritize and assign tasks.
- Emergency Management Suite
- Navigate360 Training Institute
- PBIS Rewards
- Suite360
-
Behavioral Threat Assessment Case Manager
Getting Started BTA Webinar Links User Management BTA Feature/Function Overview Behavioral Threat Assessment: CSTAG Behavioral Threat Assessment: NTAC Behavioral Threat Management: Suicide Risk Screening and Management Analytics & Reporting Troubleshooting Release Notes & Updates Click here for BTA Resources / User Guides State Specific Guidance
- Visitor Management
- School Check In
- ALICE Training Institute
- Detect - Social Sentinel
- P3 - Anonymous Tip Reporting
- Resources
- Back-to-School
Editing Contact Roles
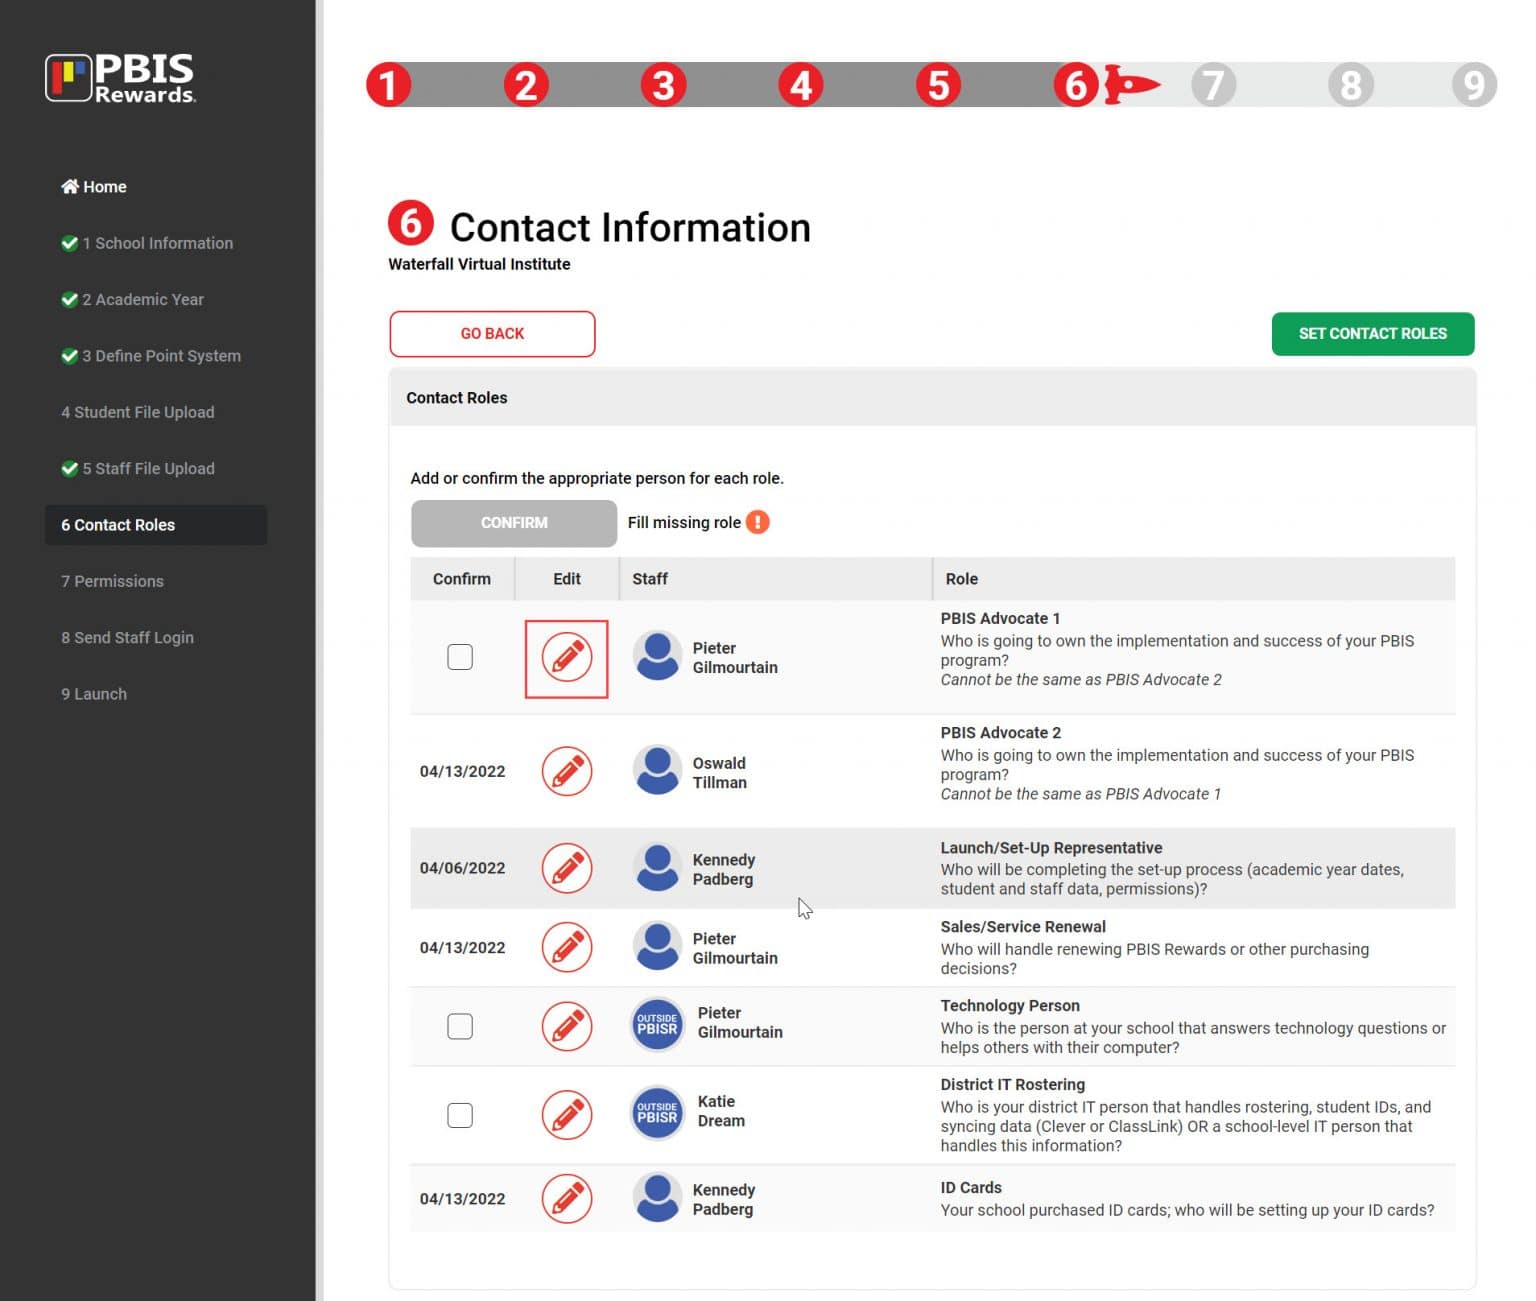
Whether The Contact Roles are where you will record the school team members that are responsible for running PBIS Rewards for your campus. Whether from the Launch Wizard or right in the PBIS Rewards web browser, adding or editing the Contact Roles is as simple as filling in the school staff member with a search or creating the contact and then confirming them. This will be done in the Launch Wizard the very first-time PBIS Rewards is set up for your school and then maintained going forward in the School Information section of Settings. Important: Update the Contacts Roles with changes as they occur through out the year.
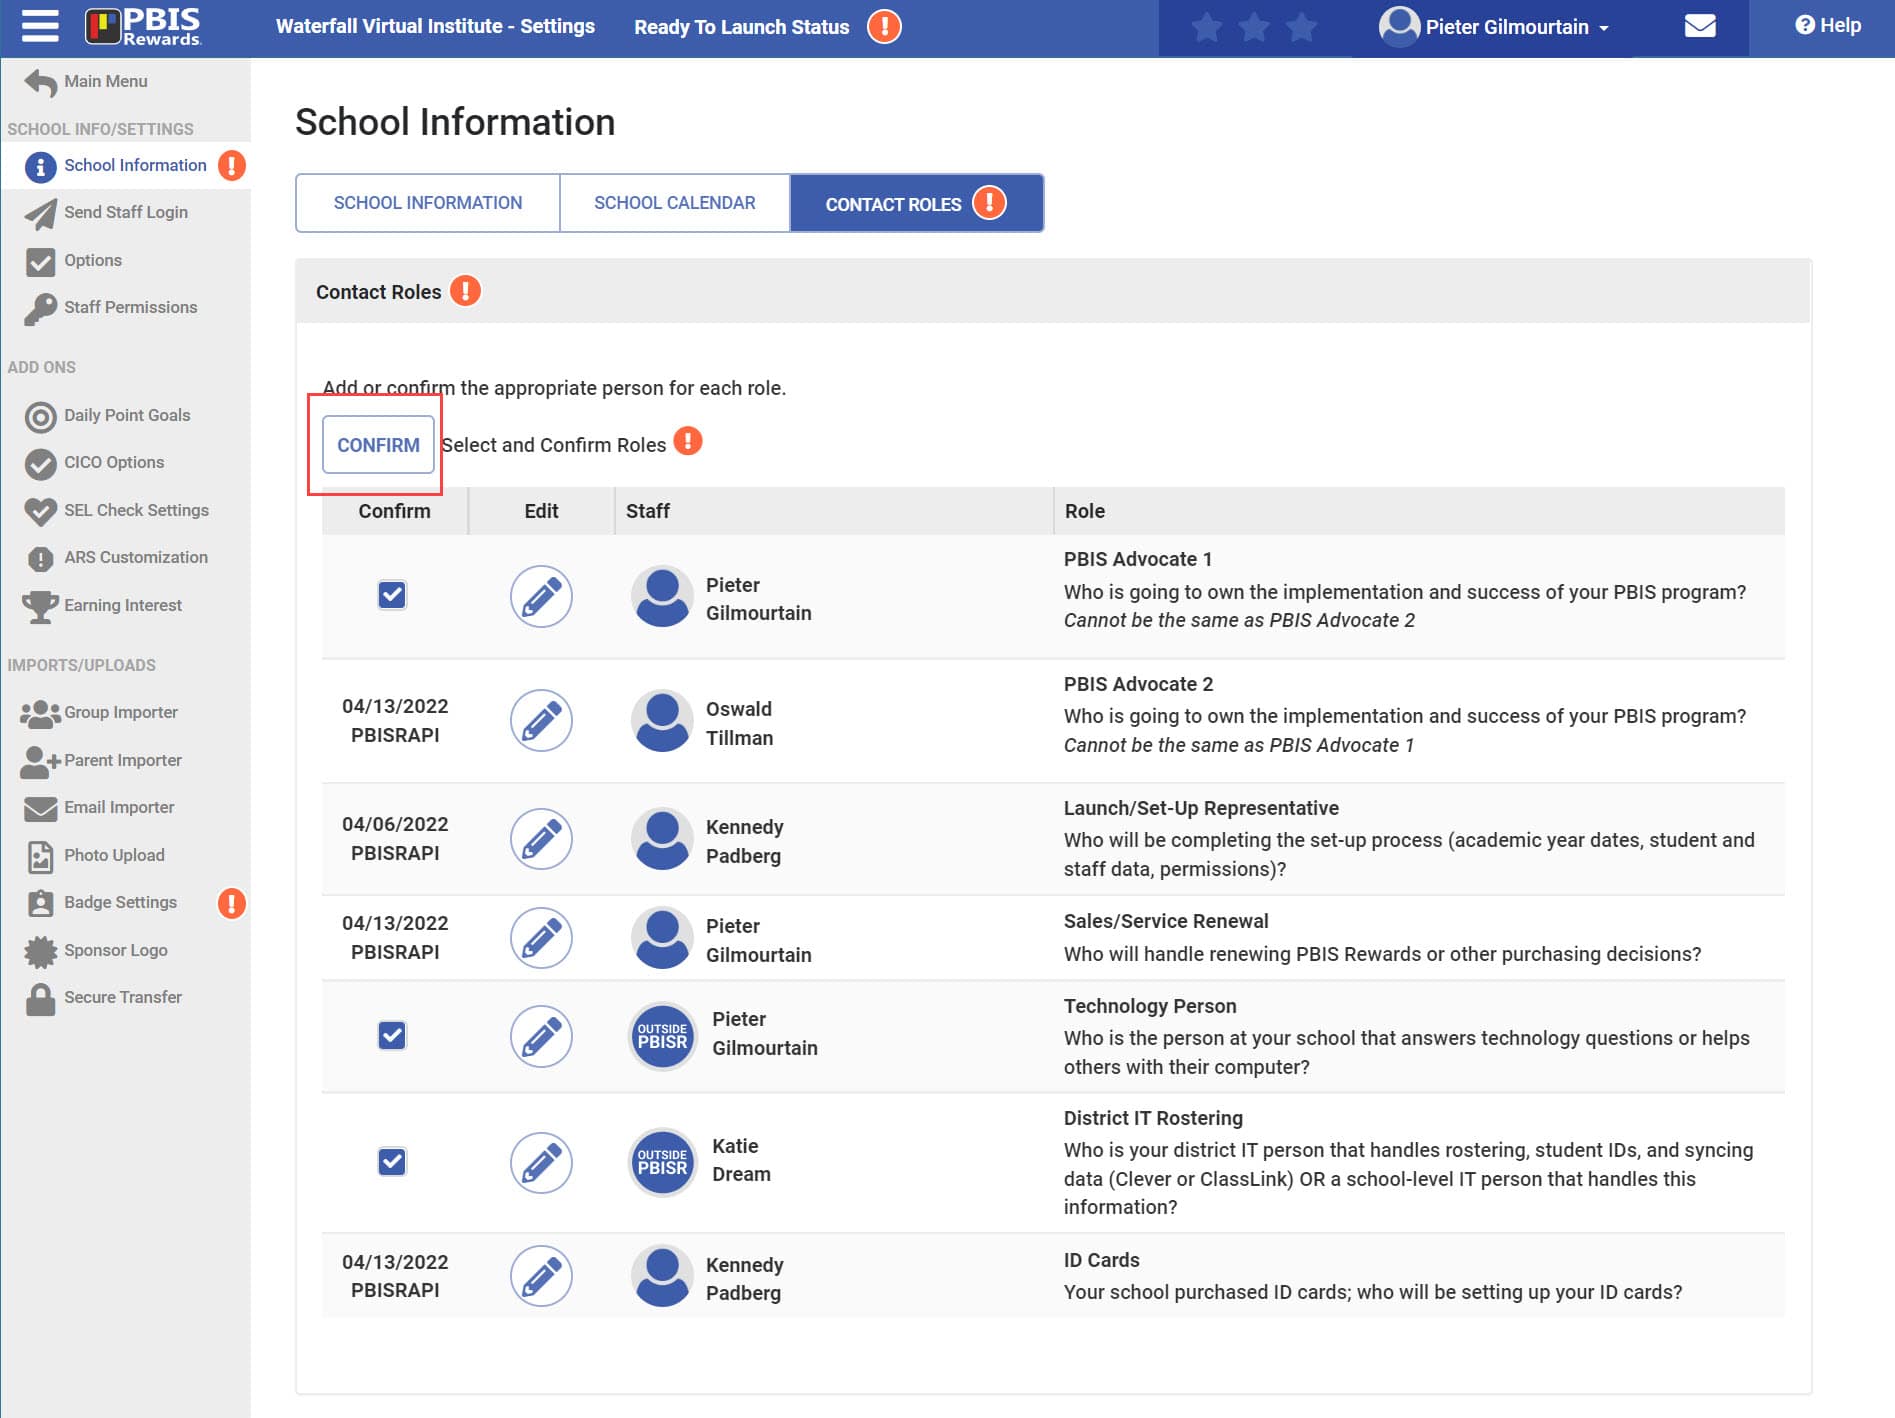
Select “Settings” from the left side main menu.
- Select “School Information.”
- Select “Contact Roles.”
- Use the edit pencil to change any users that need to be updated. First, attempt a search for the user, if the user is not available in the Staff list for PBIS Rewards, use the “Add Manually” button to create the user.
- Check next to any contact that has an empty checkbox to confirm their assignment.
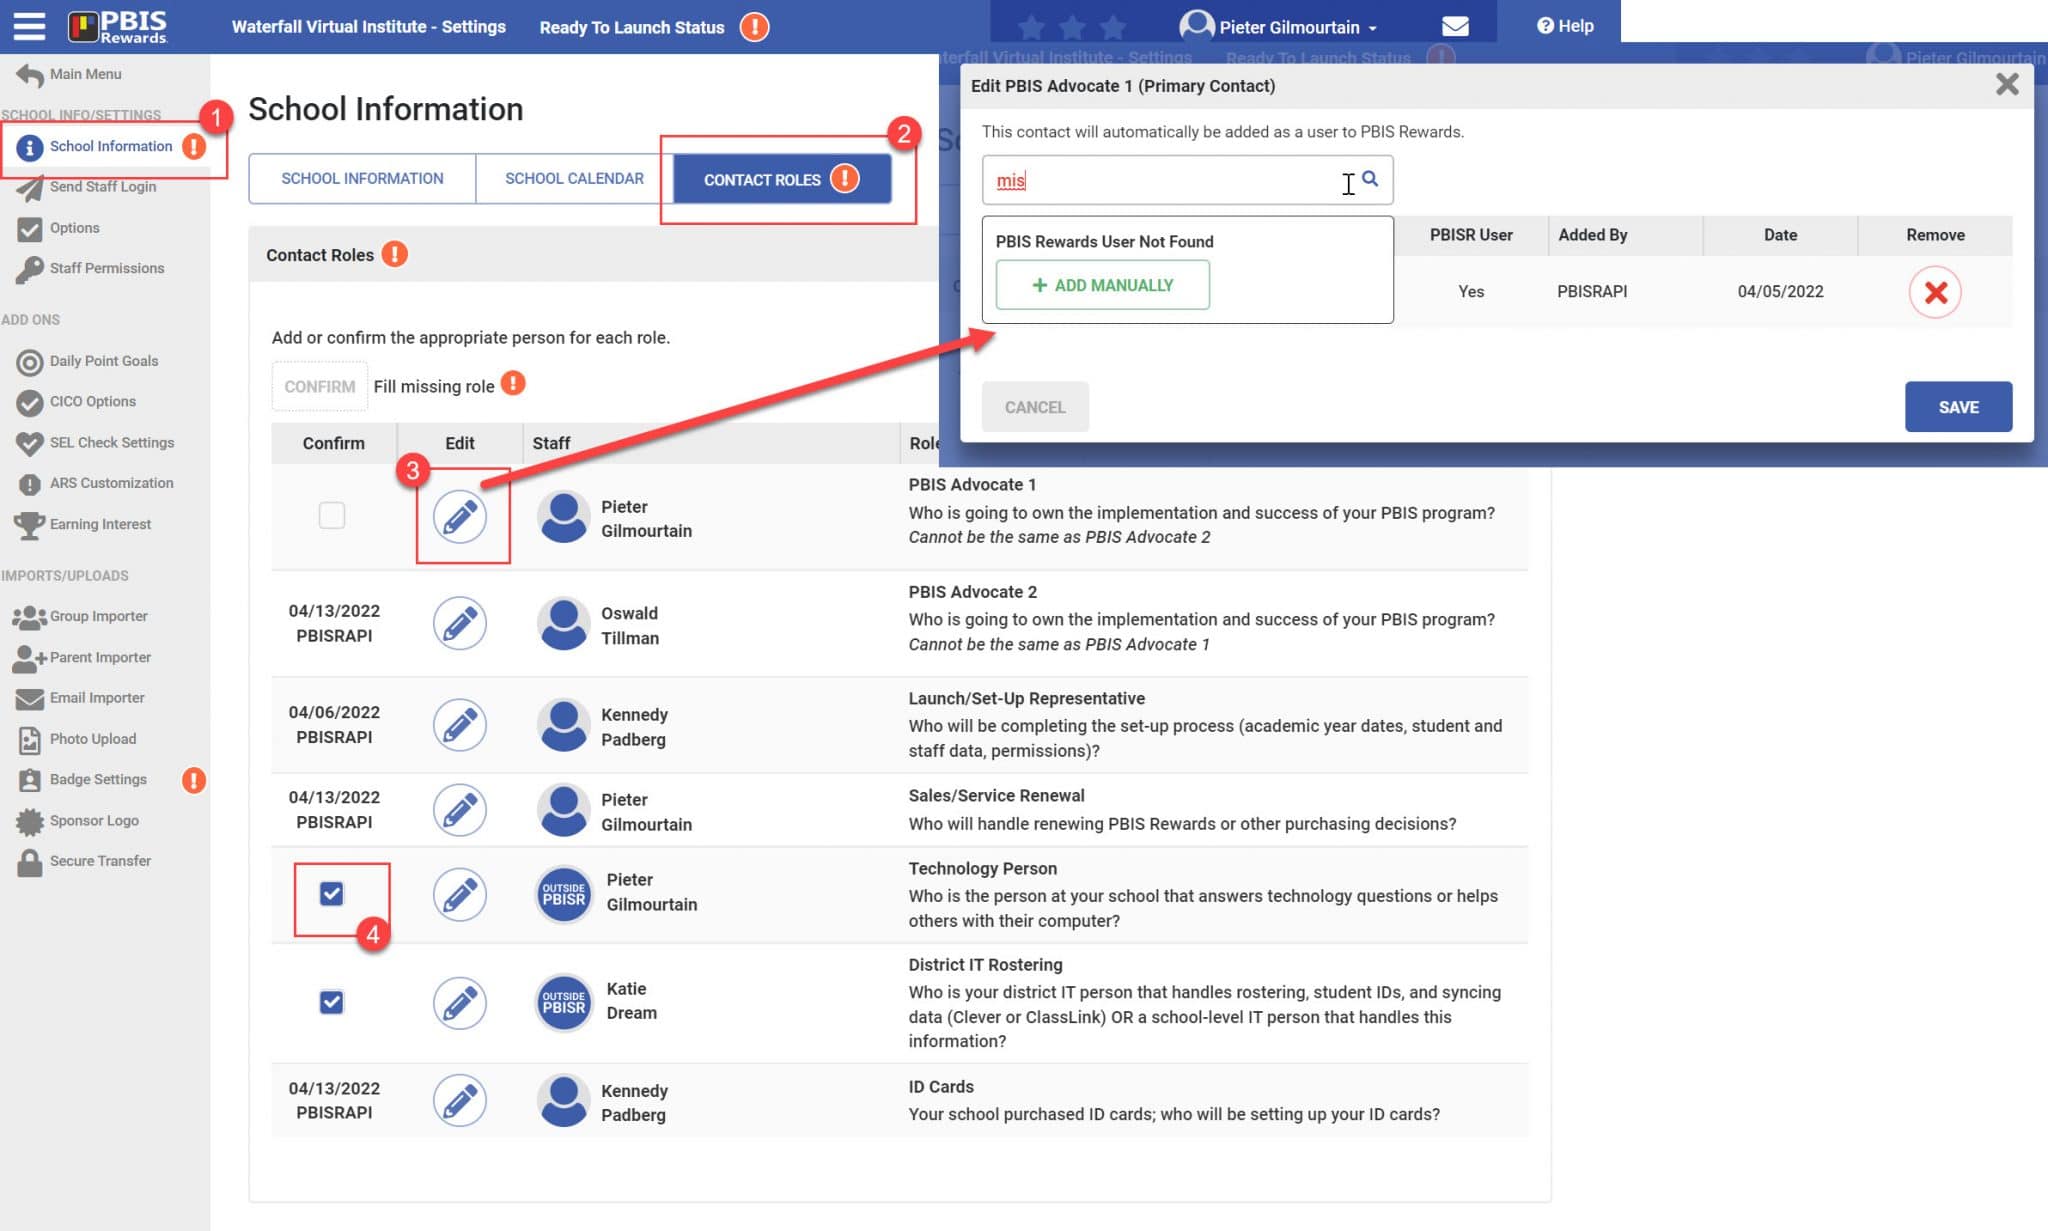
Once all the roles are filled, select “Confirm” and then “Save.”
Note: If you are a renewing school, your relaunch will not be complete until the School Calendar information is also completed.