Maps Navigation- EMS
Discover the tools to help you make the most of EMS Maps, a powerful mapping tool for emergency planning.
- Emergency Management Suite
- Navigate360 Training Institute
- PBIS Rewards
- Suite360
-
Behavioral Threat Assessment Case Manager
Getting Started BTA Webinar Links User Management BTA Feature/Function Overview Behavioral Threat Assessment: CSTAG Behavioral Threat Assessment: NTAC Behavioral Threat Management: Suicide Risk Screening and Management Analytics & Reporting Troubleshooting Release Notes & Updates Click here for BTA Resources / User Guides State Specific Guidance
- Visitor Management
- School Check In
- ALICE Training Institute
- Detect - Social Sentinel
- P3 - Anonymous Tip Reporting
- Resources
- Back-to-School
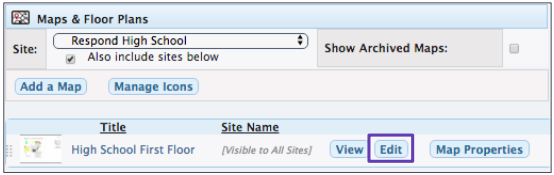
From the Maps & Floor Plans page, click the Edit button to the right of the map you want.
Or if you're already viewing a map, you can click Edit at the top of the page.
To know you're in edit mode, you will see the option "Done Editing." If you still have a button that reads “Edit,” you are in view-only mode.

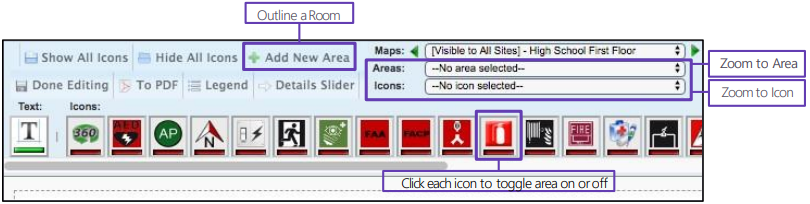
Navigating the Map
Basic map navigation features include:
- Scroll by using your mouse wheel or by using the bar at the left.
- To move around the page when zoomed in, left-click and drag the map around the screen to move to different portions.
- For a better view of the whole map click the small square on the left bar to fit to window.
- To zoom to a specific icon or area you have created, select it from the drop-down menus at the top right of the page.
- Set all icons to currently show or hide by selecting either of those buttons in the upper left of the page.
- Click on any icon in the row to toggle the corresponding icons on or off.