Web Camera Install- VMS
Learn how to install a web camera for use with Navigate360 Visitor Management.
- Emergency Management Suite
- Navigate360 Training Institute
- PBIS Rewards
- Suite360
-
Behavioral Threat Assessment Case Manager
Getting Started BTA Webinar Links User Management BTA Feature/Function Overview Behavioral Threat Assessment: CSTAG Behavioral Threat Assessment: NTAC Behavioral Threat Management: Suicide Risk Screening and Management Analytics & Reporting Troubleshooting Release Notes & Updates Click here for BTA Resources / User Guides State Specific Guidance
- Visitor Management
- School Check In
- ALICE Training Institute
- Detect - Social Sentinel
- P3 - Anonymous Tip Reporting
- Resources
- Back-to-School
Web Camera Install

Navigate360 recommends the Logitech C925e Webcam for the best high quality image capture.
Please follow the below steps to set up your camera in Visitor Management:
- Plug your webcam into an available USB port on the computer
- Log into Visitor Management with your email and password
- Next, navigate to Device Settings by clicking the gear icon on the side navigation menu
- Then click on the Camera Setup tab
- At the top of the page you will see a list of options for each camera connected to your computer
- If you do not see your camera listed, please check your browser settings and allow camera access for Visitor Management
- Select your desired camera from the list and click Save
- If you would like to test the camera connection/functionality click on Start Camera
Not seeing the correct camera preview? Or no camera preview at all?
Please review VM Web Cam Troubleshooting for more information.
- To use your camera as the primary scanning method in Visitor Management:
- Click on the ID Scanning Method tab and then select Camera Only
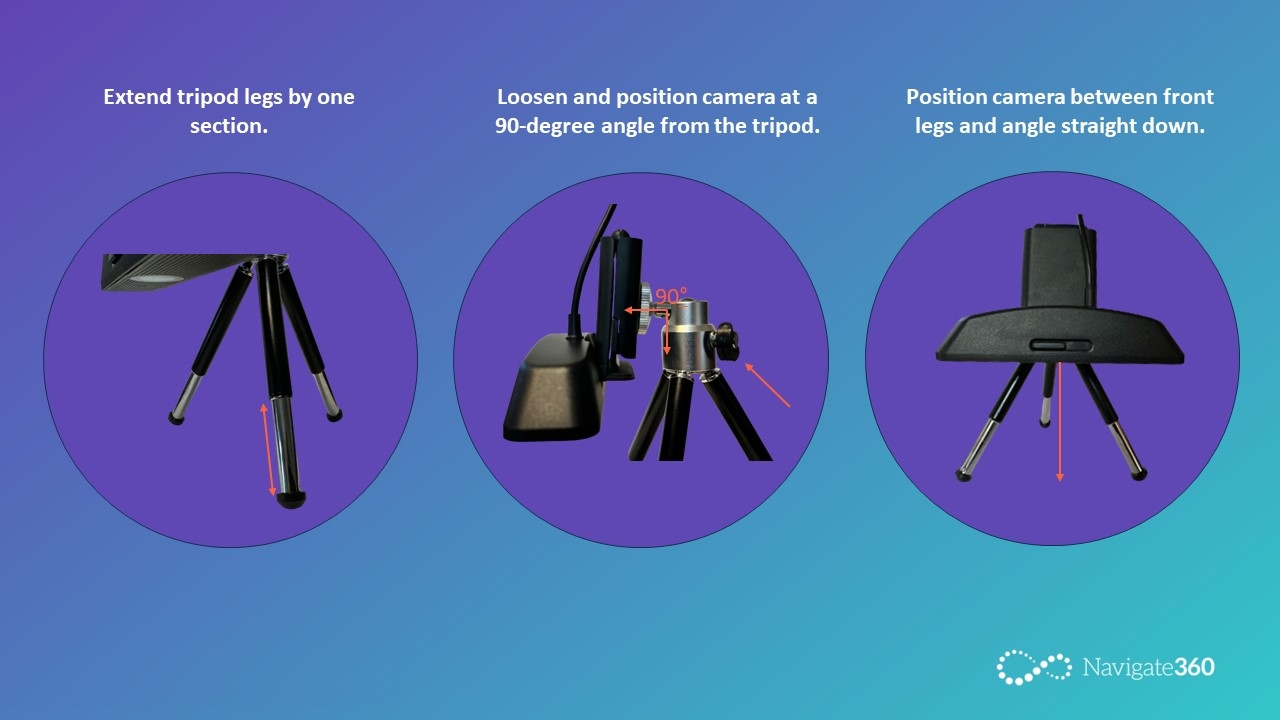
Desktop Setup
To ensure the most effective and efficient scan from your webcam, we recommend setting the webcam on a flat surface as outlined in this image.
Visitors can then place their ID flat on the surface below during the process.