How to Customize Case Details- BTA
Learn how to personalize and tailor case details to better suit your needs with the help of BTA's customizable details..
- Emergency Management Suite
- Navigate360 Training Institute
- PBIS Rewards
- Suite360
-
Behavioral Threat Assessment Case Manager
Getting Started BTA Webinar Links User Management BTA Feature/Function Overview Behavioral Threat Assessment: CSTAG Behavioral Threat Assessment: NTAC Behavioral Threat Management: Suicide Risk Screening and Management Analytics & Reporting Troubleshooting Release Notes & Updates Click here for BTA Resources / User Guides State Specific Guidance
- Visitor Management
- School Check In
- ALICE Training Institute
- Detect - Social Sentinel
- P3 - Anonymous Tip Reporting
- Resources
- Back-to-School
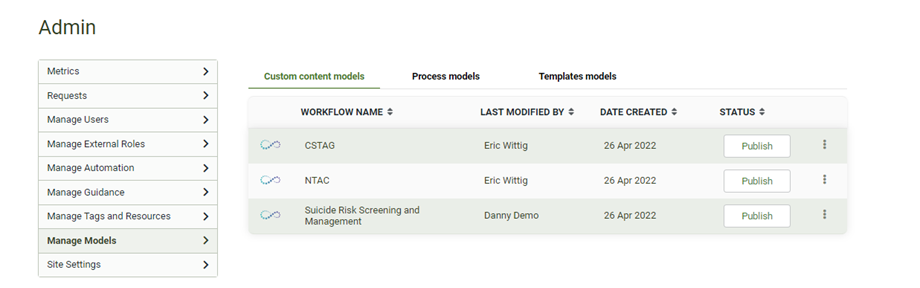
From the District Admin Dashboard, you can view or edit any of your Process Models. You will need the admin permission of “Manage System Customization” to add a custom field.
Click “Manage Models” This will show you all of your Process Models.
Next to each process, click “∙∙∙ > edit” to modify your custom fields.
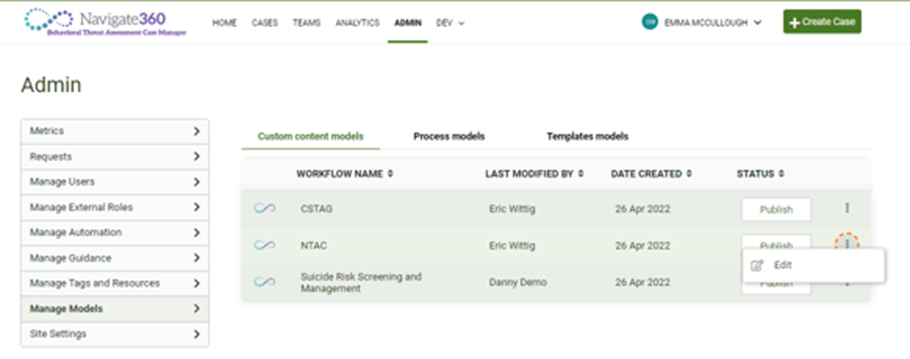
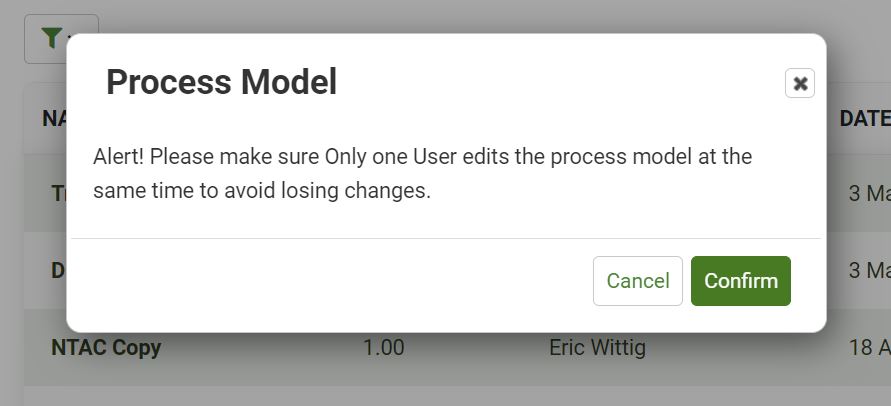
A Process Model pop-up will appear to notify you that only one user can edit at a time. Click “Confirm.”
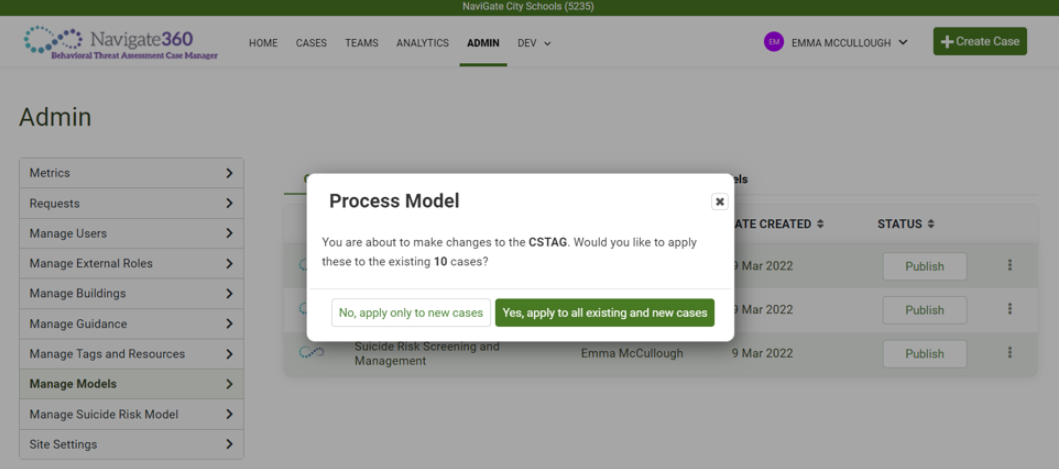
After confirming, a Process Model pop-up will appear asking if you would like to apply your changes ONLY to new cases made after the change goes into effect or retroactively to all existing in addition to new cases.
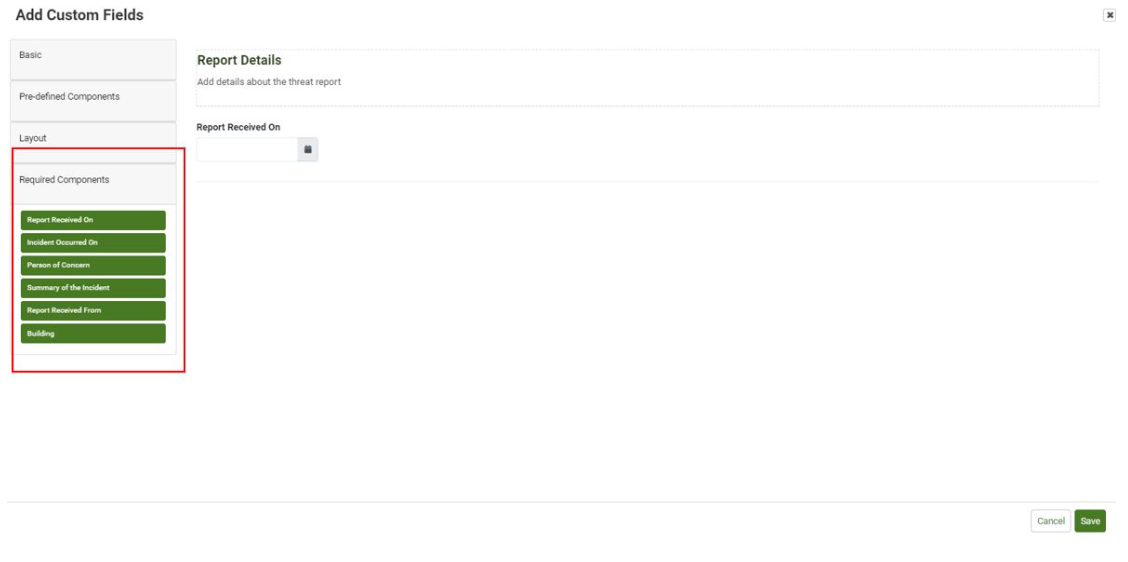
Once you open the Process Model you wish to modify, view the Customize Case Details on the left hand side. You can edit the fields in the Customize Case Details section by clicking the “Add Custom Fields" button.
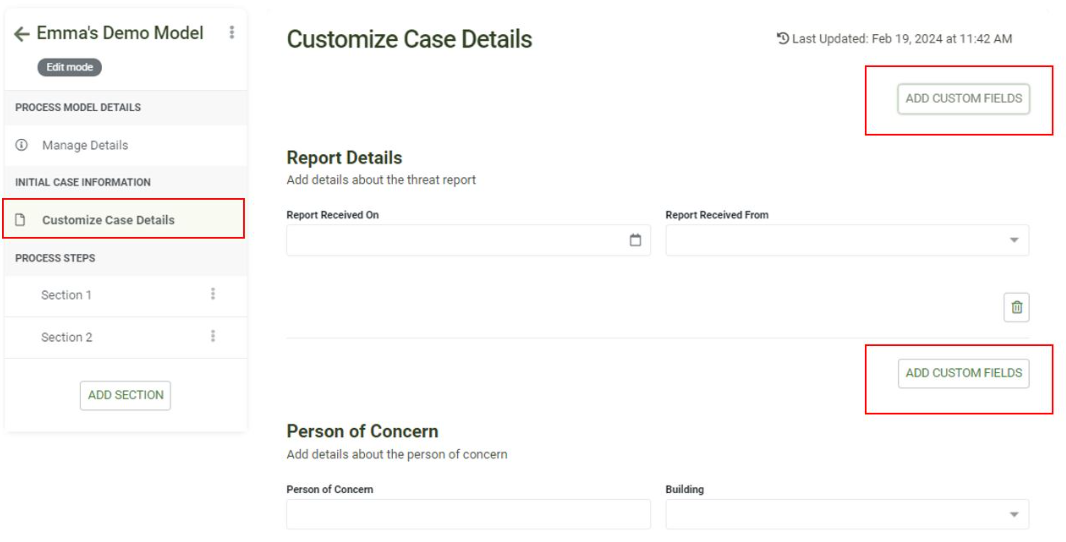
Users can edit the title of each field and click 'save'. Fields can be removed, however, required fields must exist within the section in order to publish. To see a list of required fields and to drag and drop them into the section, click on the "Required Components" section of the Custom Fields Library on the left-hand side