How to Create a Custom Process Model
Learn how to create a custom process model in Behavioral Case Manager.
- Emergency Management
- Connect360
- PBIS Rewards
- Hall Pass
- Preparation & Response Training
- Behavioral Case Manager
- Visitor Management
-
Compass
Training Workshops Getting Started On-Demand Data & User Management Compass Curriculum for Students, Staff, & Families Compass Behavior Intervention Compass Mental Health + Prevention Compass for Florida - Character Ed, Resiliency, & Prevention Compass for Texas - Character Ed Analytics & Reporting Release Notes & Updates Additional Resources
- School Check In
- ALICE Training Institute
- Detect
- Anonymous Tip Reporting
- Resources
- Back-to-School
User Permissions:
User will need Manage System Customization permissions to complete the following steps.
Click here for more information on how to manage a user’s permissions.
- Log into Case Manager.
- Select Admin tab.
- Click Manage Models node and select Process Models tab.

- Click Create new.
- Enter Process Model Details.
- Name (Required)
- Description
- Note
- Click Start.
- Initial Case Information
- Click ADD CUSTOM FIELDS.
- Drag and Drop custom fields to desired areas.
- Classifications (Optional)
- Include Tasks (Optional)
- Include Resources (Optional)
- Include Tags (Optional)
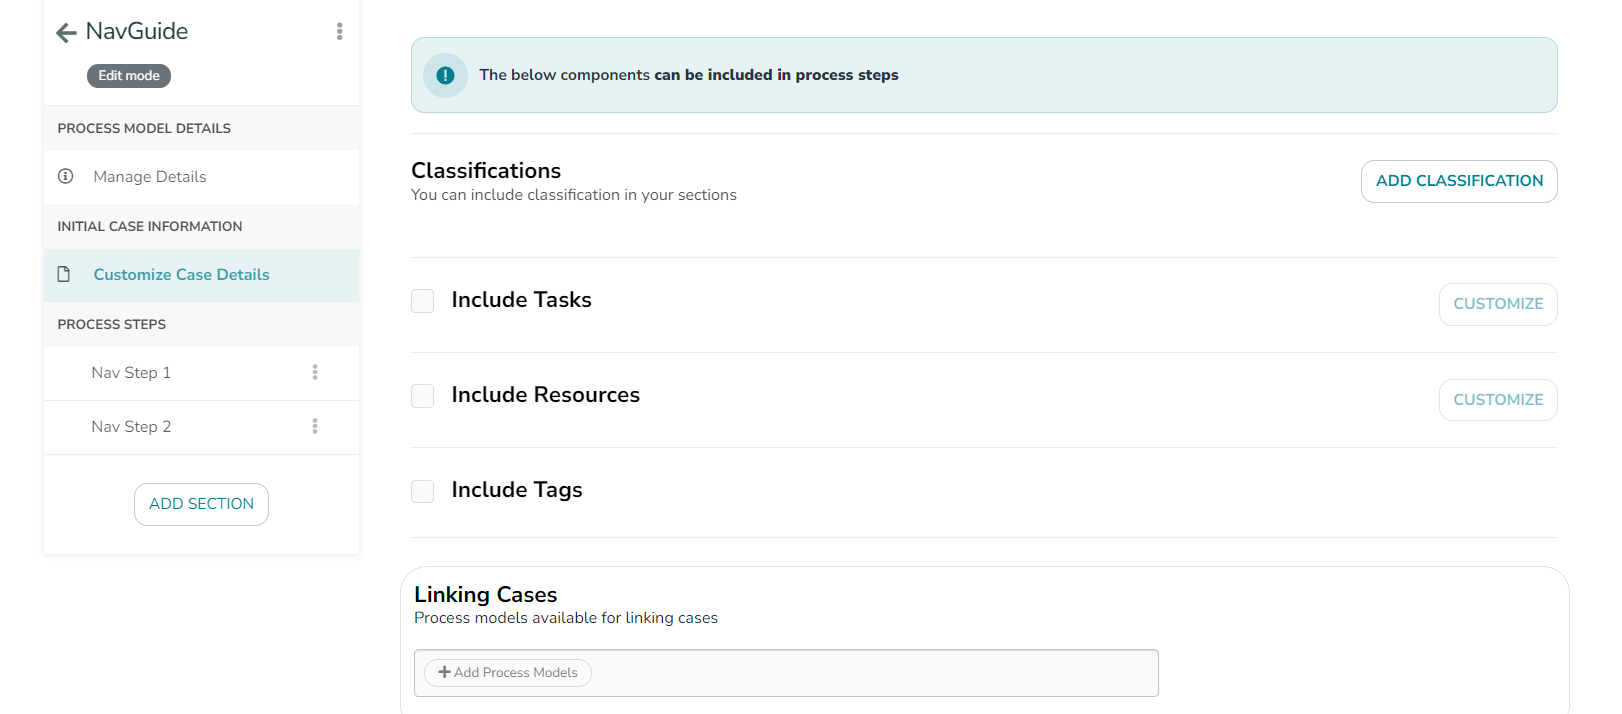
- Link Process Models
- Click Add Process Models.
- Click Save.
-
Process Steps
- To add additional sections to model, click ADD SECTION.
- Name the section.
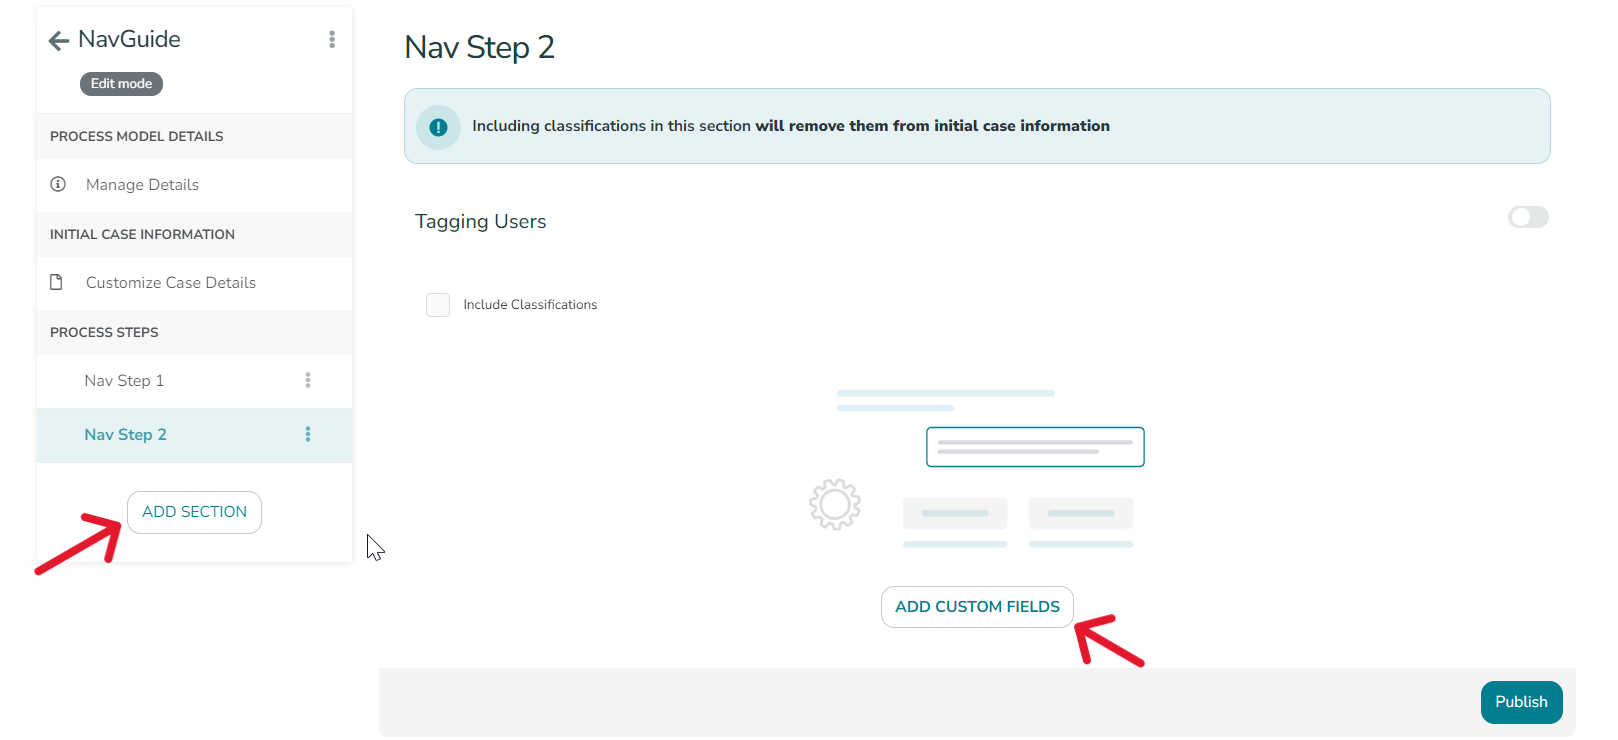
- Click ADD CUSTOM FIELDS.
- Drag and Drop custom fields to desired areas.
- Click Save.
- Name the section.
- To add additional sections to model, click ADD SECTION.
- To enable/disable Tagging Users, toggle the switch on/off.
- For more information regarding Tagging Users click here.
- Once complete with customization, click Publish.
About the Custom Process Model:
Discover how the Custom Process Model and custom fields can enhance user workflow. Click here to explore their features and functionality!