Adding Users Manually & Via .CSV
Learn how to add users to PRT quickly and efficiently.
- Emergency Management
- Campus360
- Connect360
- PBIS Rewards
- Hall Pass
- Preparation & Response Training
- Behavioral Case Manager
- Visitor Management
-
Compass Curriculum
Training Workshops Getting Started On-Demand Release Notes & Updates Data & User Management Compass Curriculum for Students, Staff, & Families Compass Behavior Intervention Compass Mental Health + Prevention Compass for Florida - Character Ed, Resiliency, & Prevention Compass for Texas - Character Ed Analytics & Reporting Additional Resources
- School Check In
- ALICE Training Institute
- Digital Threat Detection
- Anonymous Tip Reporting
- Resources
- Back-to-School
Manually adding users:
eLearning Manager WarningNote: This activity requires eLearning Manager permissions. If you do not have these, please have your District Administrator contact tech@navigate360.com |
- Log into https://learn.navigate360.com using your login credentials.
- Under Quick Links, click User Management
- Click on
 New Users and then New User.
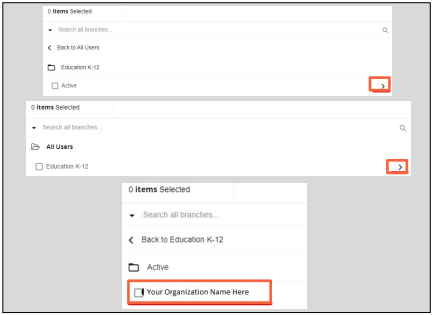
 - Complete all required fields, ending with Create User. You may need to click through the folders on page 2 to select your organization's branch.
- Immediately after creating the user, you have the option to enroll users into courses by clicking on Enroll users
Passwords
During initial setup, user passwords must include both letters and numbers in any combination.
For subsequent passwords, users will receive an error message if they try to create a password with only letters or only numbers. Additionally, they will receive an error message if they use three consecutive letters or three consecutive numbers.
Adding Users in Bulk Via .CSV:
eLearning Manager WarningNote: This activity requires eLearning Manager permissions. If you do not have these, please have your District Administrator contact tech@navigate360.com |
- Log into https://learn.navigate360.com using your login credentials.
- Under Quick Links, click User Management
- Click on
 Import & Manage and then Manage Users via CSV.
 - Download the template, and complete all required fields.
Optional Upload Fields
Update Users - Overwrite existing user data (email address and/or password) with the data uploaded via the CSV file. Select “Add users…” as shown.
- After the CSV is configured and saved:
- Upload the file by clicking the green cloud and selecting the saved CSV file.
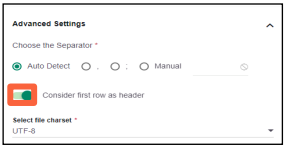
- Scroll down and open Advanced Settings. Ensure Consider first row as header is toggled on.
- Click Confirm in the lower right-hand corner.
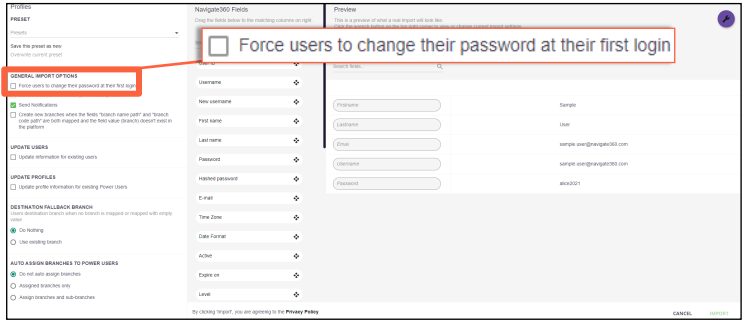
- In General Import Options, check the box for Force users to change their password at their first login.
(Optional) In General Import Options, uncheck the box for Send notifications if you plan to notify your staff later. Leaving this box checked will generate an email to each user with login instructions after the import.
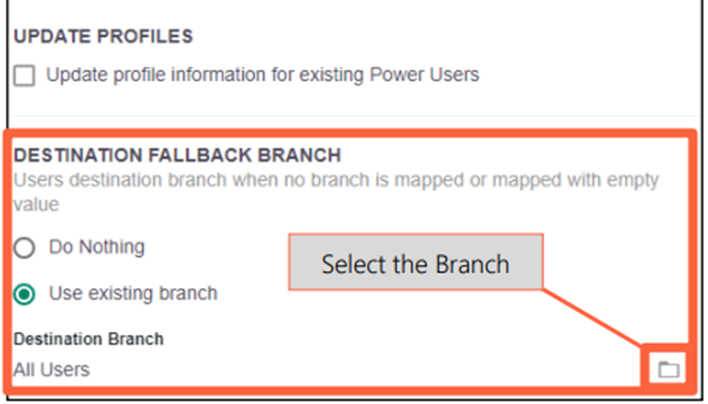
- If no branch exists on your CSV file
- Under Destination Fallback Branch, click Use Existing Branch
- Then, click the folder to search for and select your branch
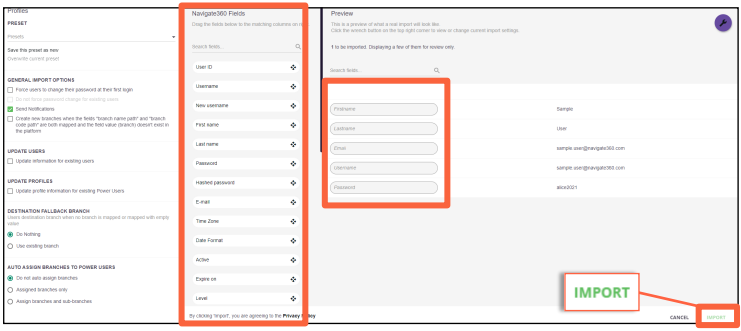
- Drag and drop the proper Navigate360 Fields to match the CSV column headers in Preview.
- Click Import in the lower right-hand corner
12. Click Import Users on the popup box.
Important
If you opt to select update information for existing users, the password field entered in the CSV will supersede any import setting and change the user's password.
If you do not wish your existing users to have new passwords, Do NOT toggle update information for existing users.
The option to set passwords in bulk is only available during the initial user setup process.