Admin Setup: Teacher Rewards (New)- PBIS
Discover how to set up a teacher rewards.
- Emergency Management
- Connect360
- PBIS Rewards
- Hall Pass
- Preparation & Response Training
- Behavioral Case Manager
- Visitor Management
-
Compass
Training Webinars Getting Started Webinar Links Data & User Management Compass Curriculum for Students, Staff, & Families Compass Behavior Intervention Compass Mental Health + Prevention Compass for Florida - Character Ed, Resiliency, & Prevention Compass for Texas - Character Ed Analytics & Reporting Release Notes & Updates Additional Resources
- School Check In
- ALICE Training Institute
- Detect
- Anonymous Tip Reporting
- Resources
- Back-to-School
Teacher Rewards – Manage Email Notifications
Once in Workplace Rewards for Teachers, you’ll manage the main setup from the Admin tab at the top of the homepage. This is where you can manage My Organization, Values & Activities, and Users & Groups. (Note: If you do not see the “Admin” tab in the header you may not have the appropriate permission.)
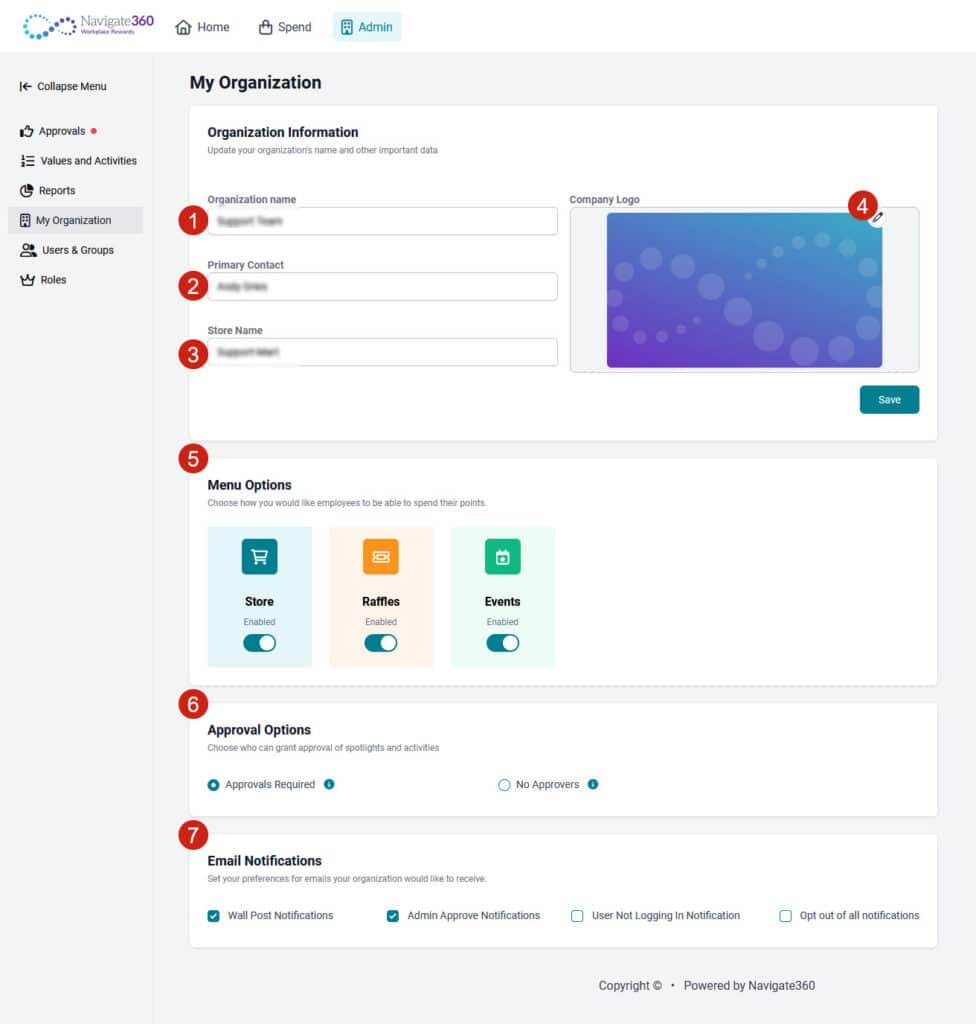
My Organization: Choose the “My Organization” tab from the admin menu.
- Edit Your Organization Name.
- Change your Primary Contact.
- Create a Store Name.
- Add a Company Logo that would be displayed on the home page.
- Decide the types of spend categories that will appear in the Spend tab.
- Choose an approval type.
- Adjust the email notifications.
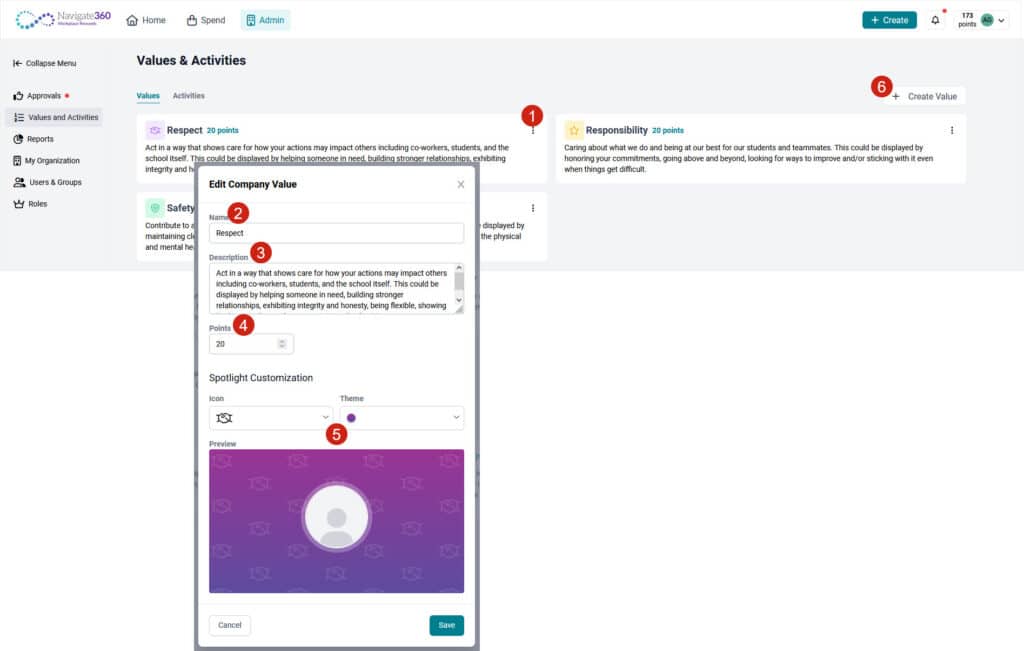
Values: The values are what your staff will be selecting when spotlighting another staff member for doing something positive. The values should represent the school culture that you want to represent. You can change these values or add more values to reflect your school’s specific culture. Choose the Values and Activities Tab from the admin menu.
- Edit the default value by selecting the three dots at the top right.
- Change the name of the value.
- Adjust the description to match the new value.
- Assign an appropriate point value. (When a staff member is spotlighted they will receive these points)
- Choose an icon and color theme.
- Create additional values.
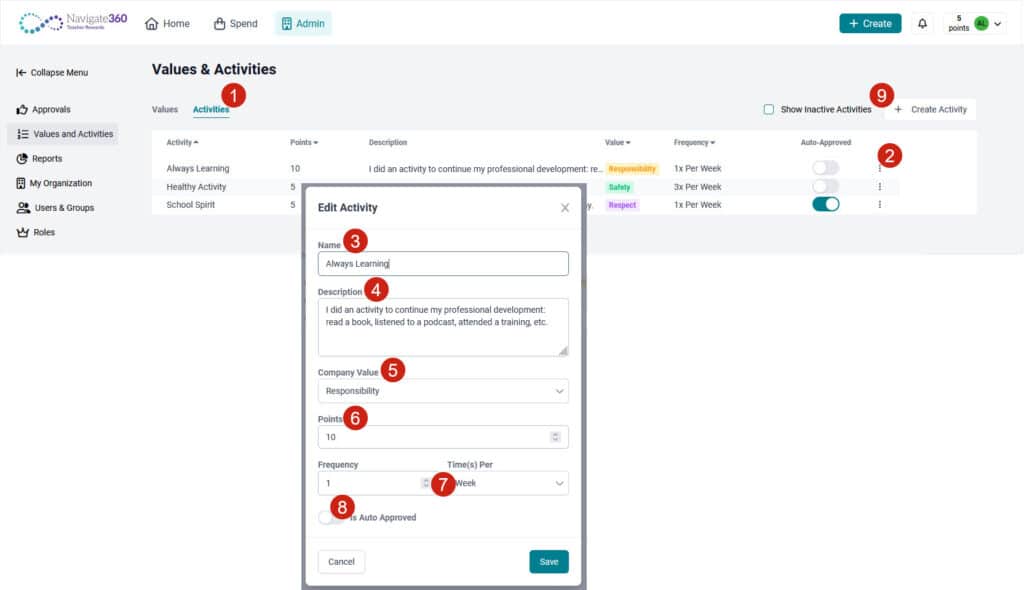
Activities: Activities are actions that your staff can take that represent your values, they are logged by the staff member doing the activity and they receive points. These activities may need to be approved by a designated approver or could have a limit for how many times they can be logged in a given time frame. Activities can be added or edited to reflect values of your school.
- Select the Activities tab to review the default activities that staff can log to earn points.
- Edit the default activity by selecting the three dots to the right.
- Change the name of an activity.
- Add the description of an activity to provide clear examples of actions that are included.
- Decide the value that is associated with this activity.
- Assign the point value for this activity.
- Include how often this activity can be logged in a given time frame.
- Determine if the activity needs to be approved before points are awarded.
- Create additional activities.
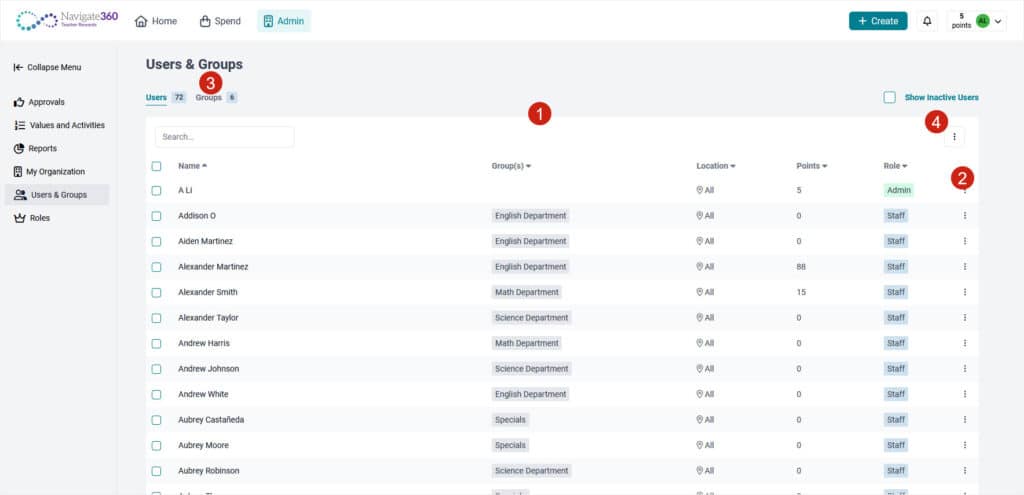
Users & Groups: From the Users & Groups tab you can see a list of the users, create groups and set up approvers for those groups.
- See list of users.
- Edit a users point balance.
- Create or edit a group.
- Utilize bulk actions like add staff to a group or update location.
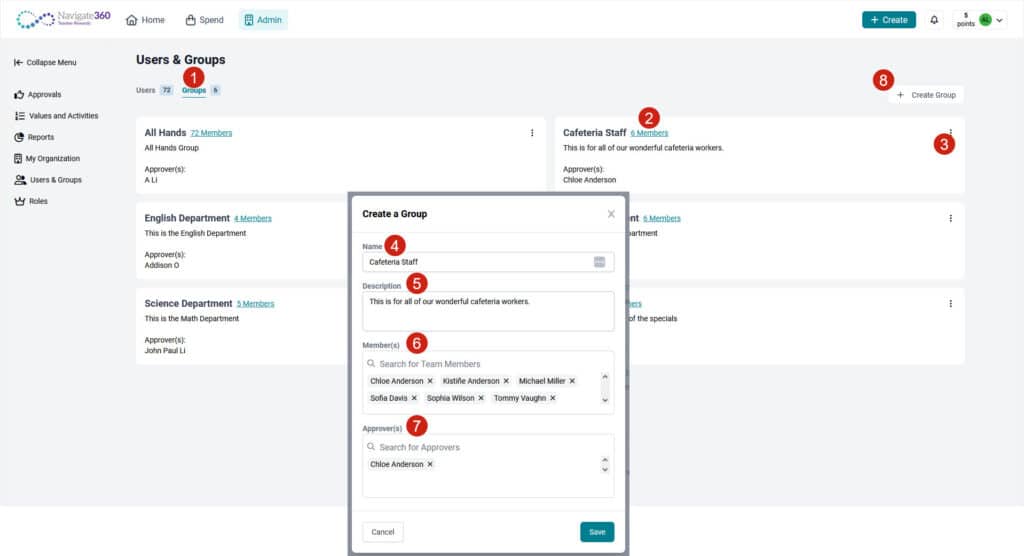
Groups and Approvers: Approvers are set at the group level. As a default all staff members are added to the All Hands group and the primary contact is the approver of that group. Other approvers can be added to the All Hands group and/or additional groups can be created with approvers in order to manage approvals across departments or grade levels.
- Select the group tab of the Users & Groups page.
- See all the member of a group.
- Click on the ellipsis (three dots) it edit a group or add approvers.
- Change the Name of the group.
- Adjust the description of the group.
- Add or remove members of the group.
- Decide the approver(s) for the group.
- Create a new group.
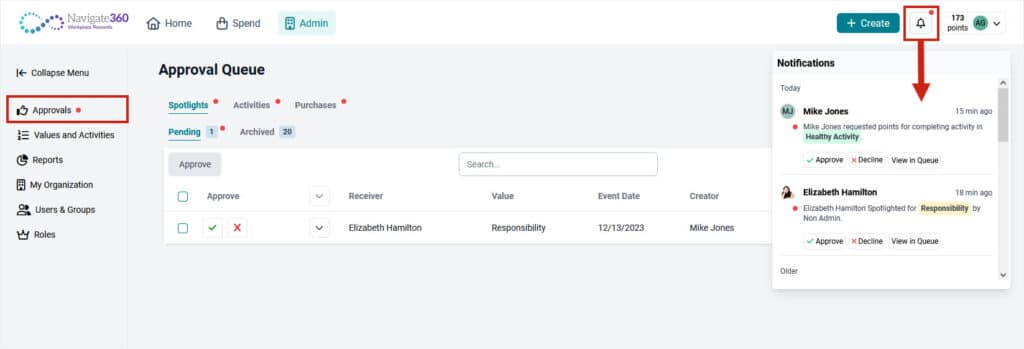
Approving Spotlights & Activities: When spotlights and activities are submitted, the approver can use notification bell in the header or the approval queue to approve or deny the submission. Approvers can be set in the Users & Group page of the admin tab.
